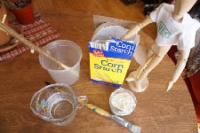
Chalk Paint
To make your chalk creations you will need the following:
- A jar, can or repurposed container
- 1/2c.cornstarch
- 2/3c. Water
- Paintbrush or fingers! (wild finger painting experience)
- food coloring (optional: for a little more mess ?)
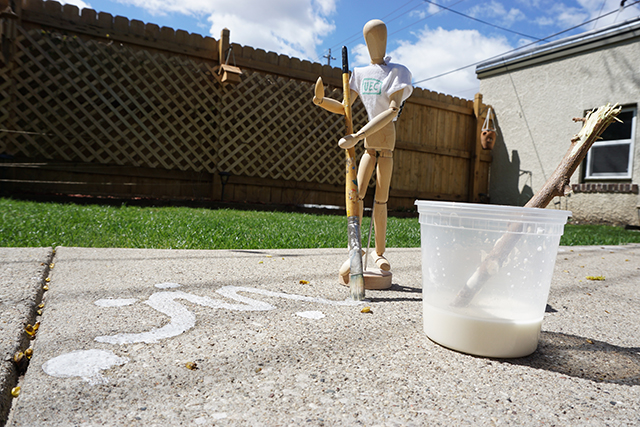
The first step to making the chalk is to scoop the cornstarch into the repurposed container. Mix well. Then add the water and stir. Once you’ve mixed your ingredients, get to your sidewalk to start painting! Make sure to paint your favorite animal, or have a family member trace your shadow!
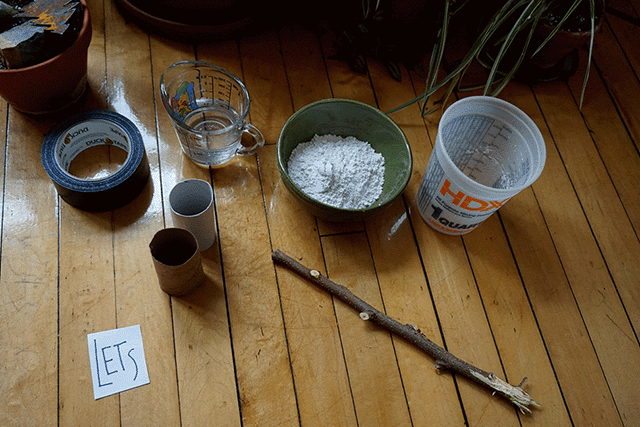
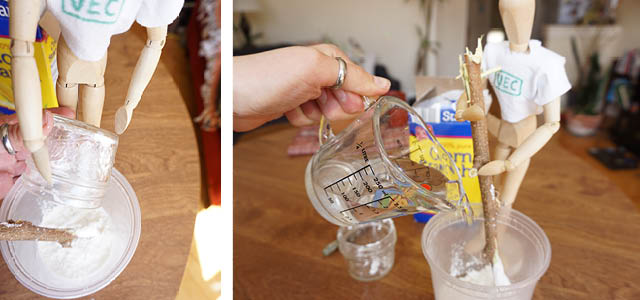
Traditional Chalk
To make traditional chalk you will need the following:
- A repurposed container (milk jug or juice carton)
- ¾ c. Plaster of Paris
- ½ c. Water
- 3 toilet paper rolls
- Duct tape or painters tape
- Optional food coloring or biodegradable paint.
Apply tape on one end of your toilet paper rolls to create molds you can pour your chalk mixture into.
In your repurposed container, mix the plaster and water and optional food coloring until you’ve made a consistent texture. Scoop your chalk mixture into your toilet paper tube mold and let sit for 12 hours.
Let the remainder of your chalk mixture dry in the repurposed container. Do not wash it down your sink. Once it’s dry, chip the remaining chalk off into the trash and then recycle the repurposed container if possible.
Once your chalk is dry, peel the toilet paper tubes and tape off and start creating in an outdoor space! Make sure to share your creations with us on social media (#uecinmybackyard) we can’t wait to see your backyard doodles!
Translated by Angélica Sánchez Mora and Anna Aragon.
¡Aprende a hacer tu propia tiza en casa!
¡Preparémonos para esas tardes más cálidas y hagamos nuestra propia tiza! Disfruto mucho la receta de yeso de París porque puedo conservar la tiza que no uso para la próxima vez, ¡pero esta receta de pintura de tiza también es bastante bonita!
Para hacer tus creaciones de tiza necesitarás lo siguiente:
- Una jarra, lata o recipiente reutilizado
- 1 / 2c. Maicena
- 2 / 3c. Agua
- Pincel o dedos! (experiencia la pintura con los dedos)
- Colorante alimentario (opcional: para un poco más de desorden ?)
El primer paso para hacer la tiza es poner la maicena en el recipiente reutilizado. Mezclar bien. Luego agrega el agua y mézclala. Una vez que hayas mezclado tus ingredientes, ¡ve a tu acera para comenzar a pintar! ¡Asegúrate de pintar a tu animal favorito o haz que un miembro de tu familia trace tu sombra!
Para crear tiza tradicional necesitaras lo siguiente:
- Un contenedor reusado (recipiente de leche o cartón de jugo)
- ¾ de taza de yeso blanco
- Media taza de agua
- 3 tubos de cartón de papel de baño
- Cinta adhesiva
- Colorante de comida o pintura biodegradable (opcional por si quieren más colores)
Comienza tapando un lado de los tubos de cartón con cinta adhesiva para que no se vaya a caer la mezcla. En el contenedor, mezcla el yeso blanco con el agua y el colorante hasta que tenga una consistencia uniforme. Llena los tubos de cartón con la mezcla y déjalos secar por un mínimo de 12 horas. Si te queda mezcla en el contenedor, déjala secar ahí y recuerda que no las debes de poner en el lavamanos por que puede causar problemas con el drenaje. Ya que la mezcla este seca en el contenedor, quítala y tírala a la basura.
Cuando estés listo para dibujar, despega el cartón y la cinta, dejando solo la tiza lista para dibujar. Comienza a crear nuevas cosas afuera y asegúrate de compartirlos con nosotros usando #uecinmybackyard. ¡Esperamos ver tus creaciones afuera!